Customizing the position of widgets on your product page allows you to highlight key information—such as countdown timers, promotions, or feature highlights—exactly where customers are most likely to notice them. This guide walks you through the complete process of adding and repositioning a widget on a product page using the Theme Editor.
Important Note Before You Start
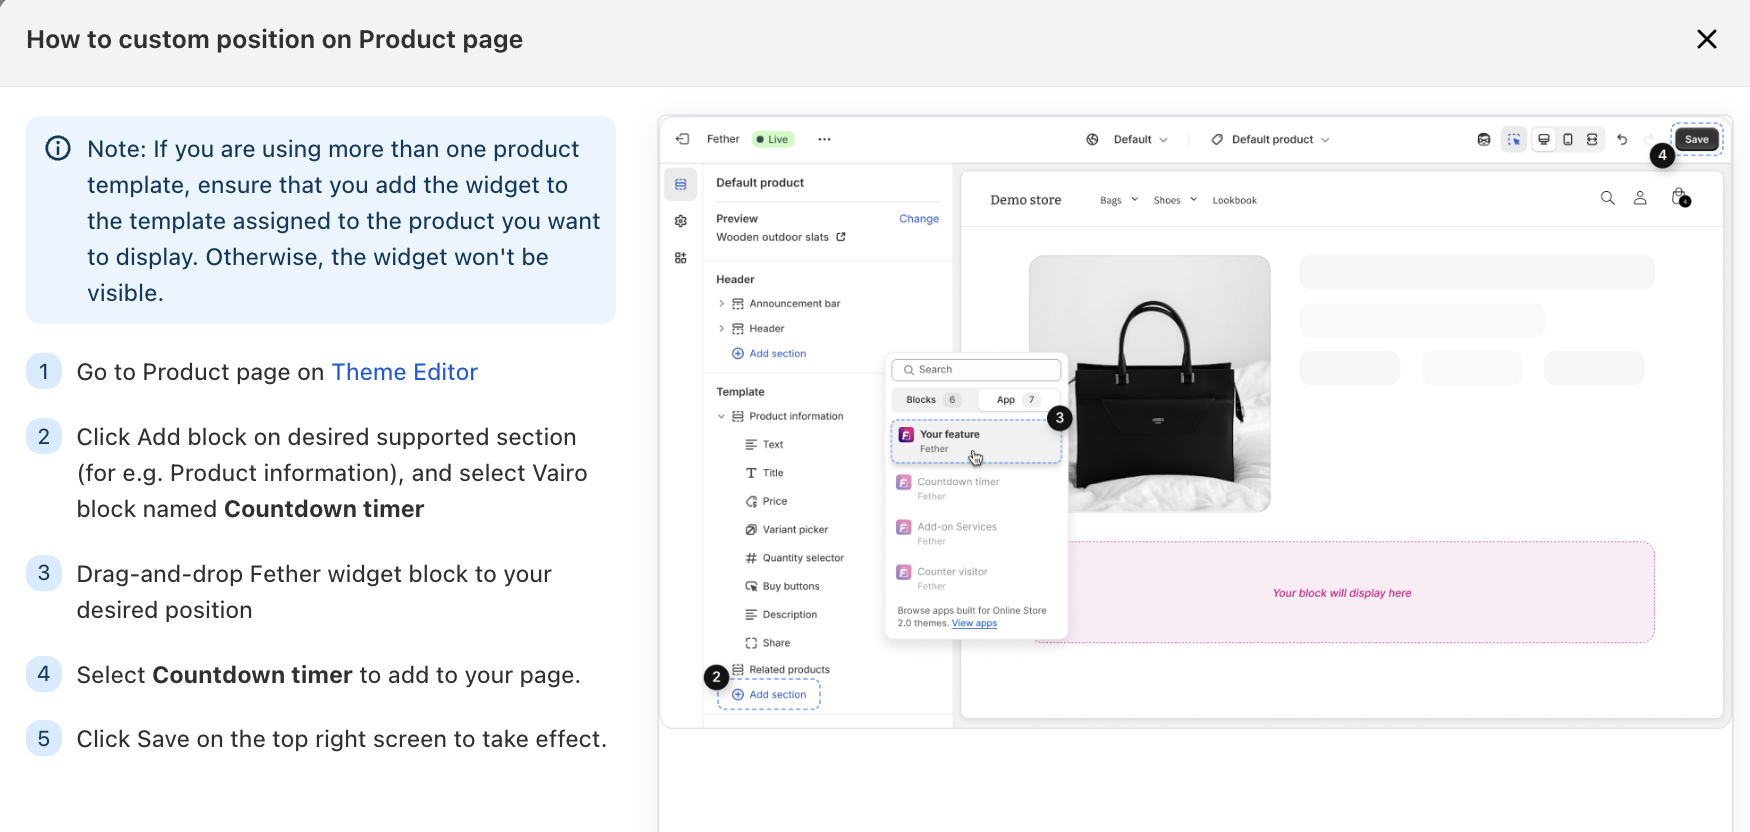
If you are using more than one product template, ensure that you add the widget to the template assigned to the product you want to display. Otherwise, the widget won't be visible.
Step-by-Step Guide to Custom Positioning
1. Open the Product Page in the Theme Editor
Go to your Shopify Admin
Navigate to Online Store → Themes
Click Customize on your active theme
From the page selector at the top, choose Products → Default product (or the relevant product template)
This opens the product page layout in the Theme Editor.

2. Click Add block on desired supported section (for e.g. Product information), and select Vairo block named Countdown timer
3. Drag-and-drop Fether widget block to your desired position
4. Select Countdown timer to add to your page.
5. Save Your Changes
Click Save in the top-right corner of the Theme Editor
Your widget is now live on the product page.
If you require further assistance, please don't hesitate to contact us at support@fether.app.
Was this article helpful?
That’s Great!
Thank you for your feedback
Sorry! We couldn't be helpful
Thank you for your feedback
Feedback sent
We appreciate your effort and will try to fix the article