Custom positioning allows you to place the Product Add-ons widget exactly where it fits best on your product page—helping improve visibility, usability, and conversion rates.
By using your theme’s editor, you can drag and drop the Product Add-ons widget into supported sections of the product page layout.
Important Note Before You Start
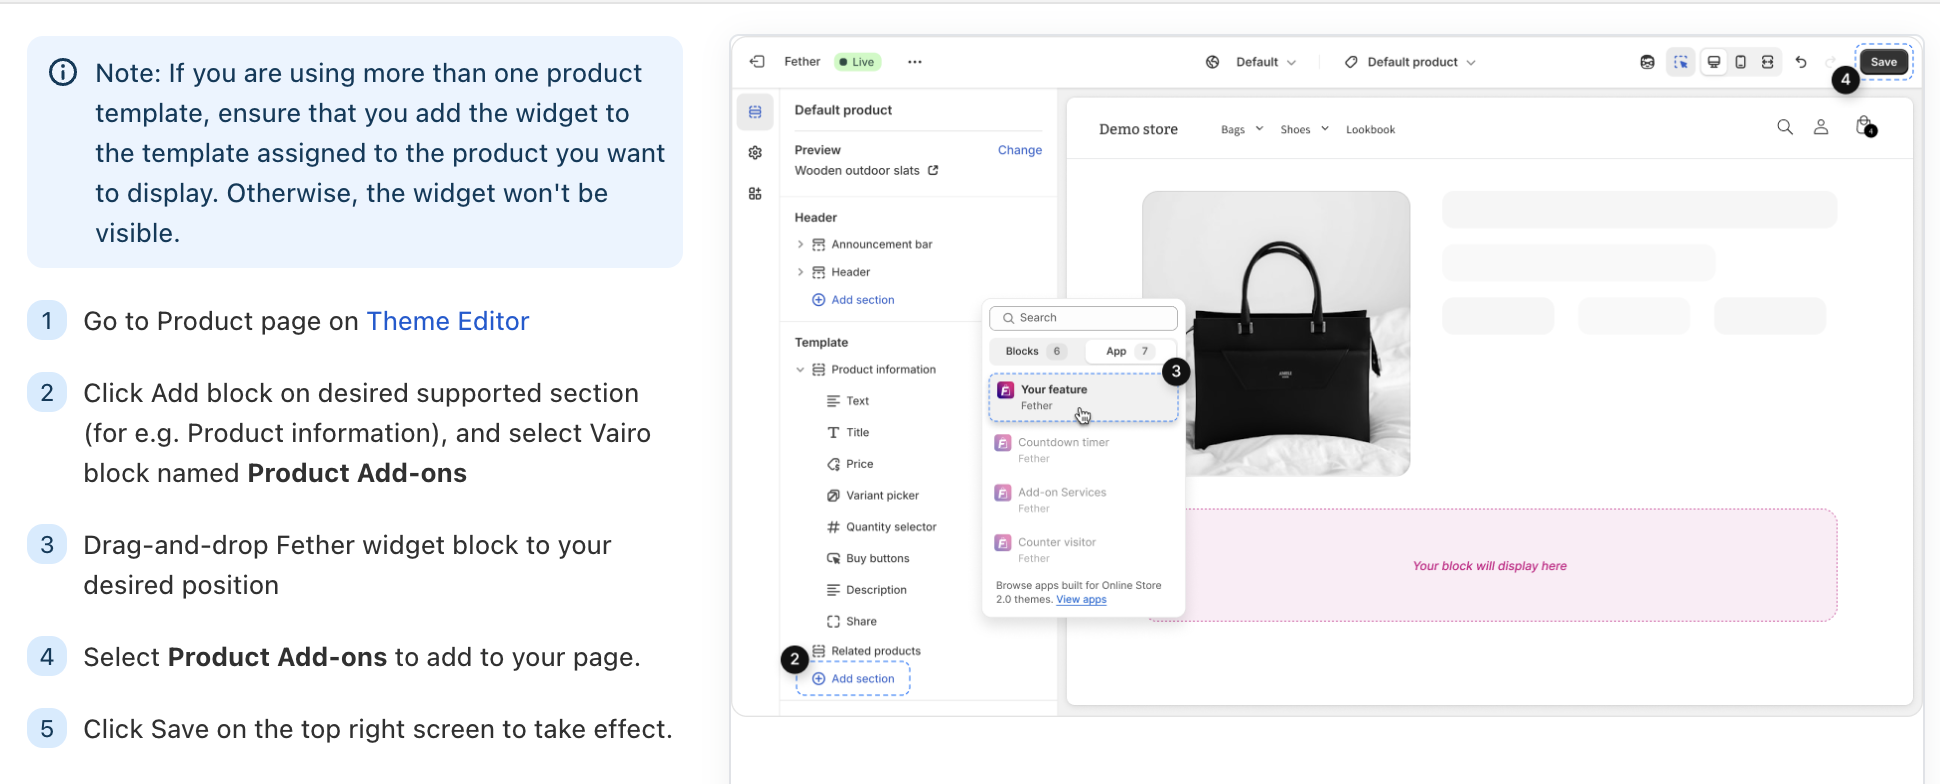
If you are using more than one product template, make sure the Product Add-ons widget is added to the same template that is assigned to the product you want to display it on.
If the widget is added to a different template, it will not be visible on the product page.
Step-by-Step Guide to Custom Positioning
Step 1: Open the Theme Editor
Go to your Shopify Admin
Navigate to Online Store → Themes
Click Customize on your active theme
From the top dropdown, select Product page
Step 2: Click Add block on desired supported section (for e.g. Product information), and select Vairo block named Product Add-ons
Step 3: Drag-and-drop Fether widget block to your desired position
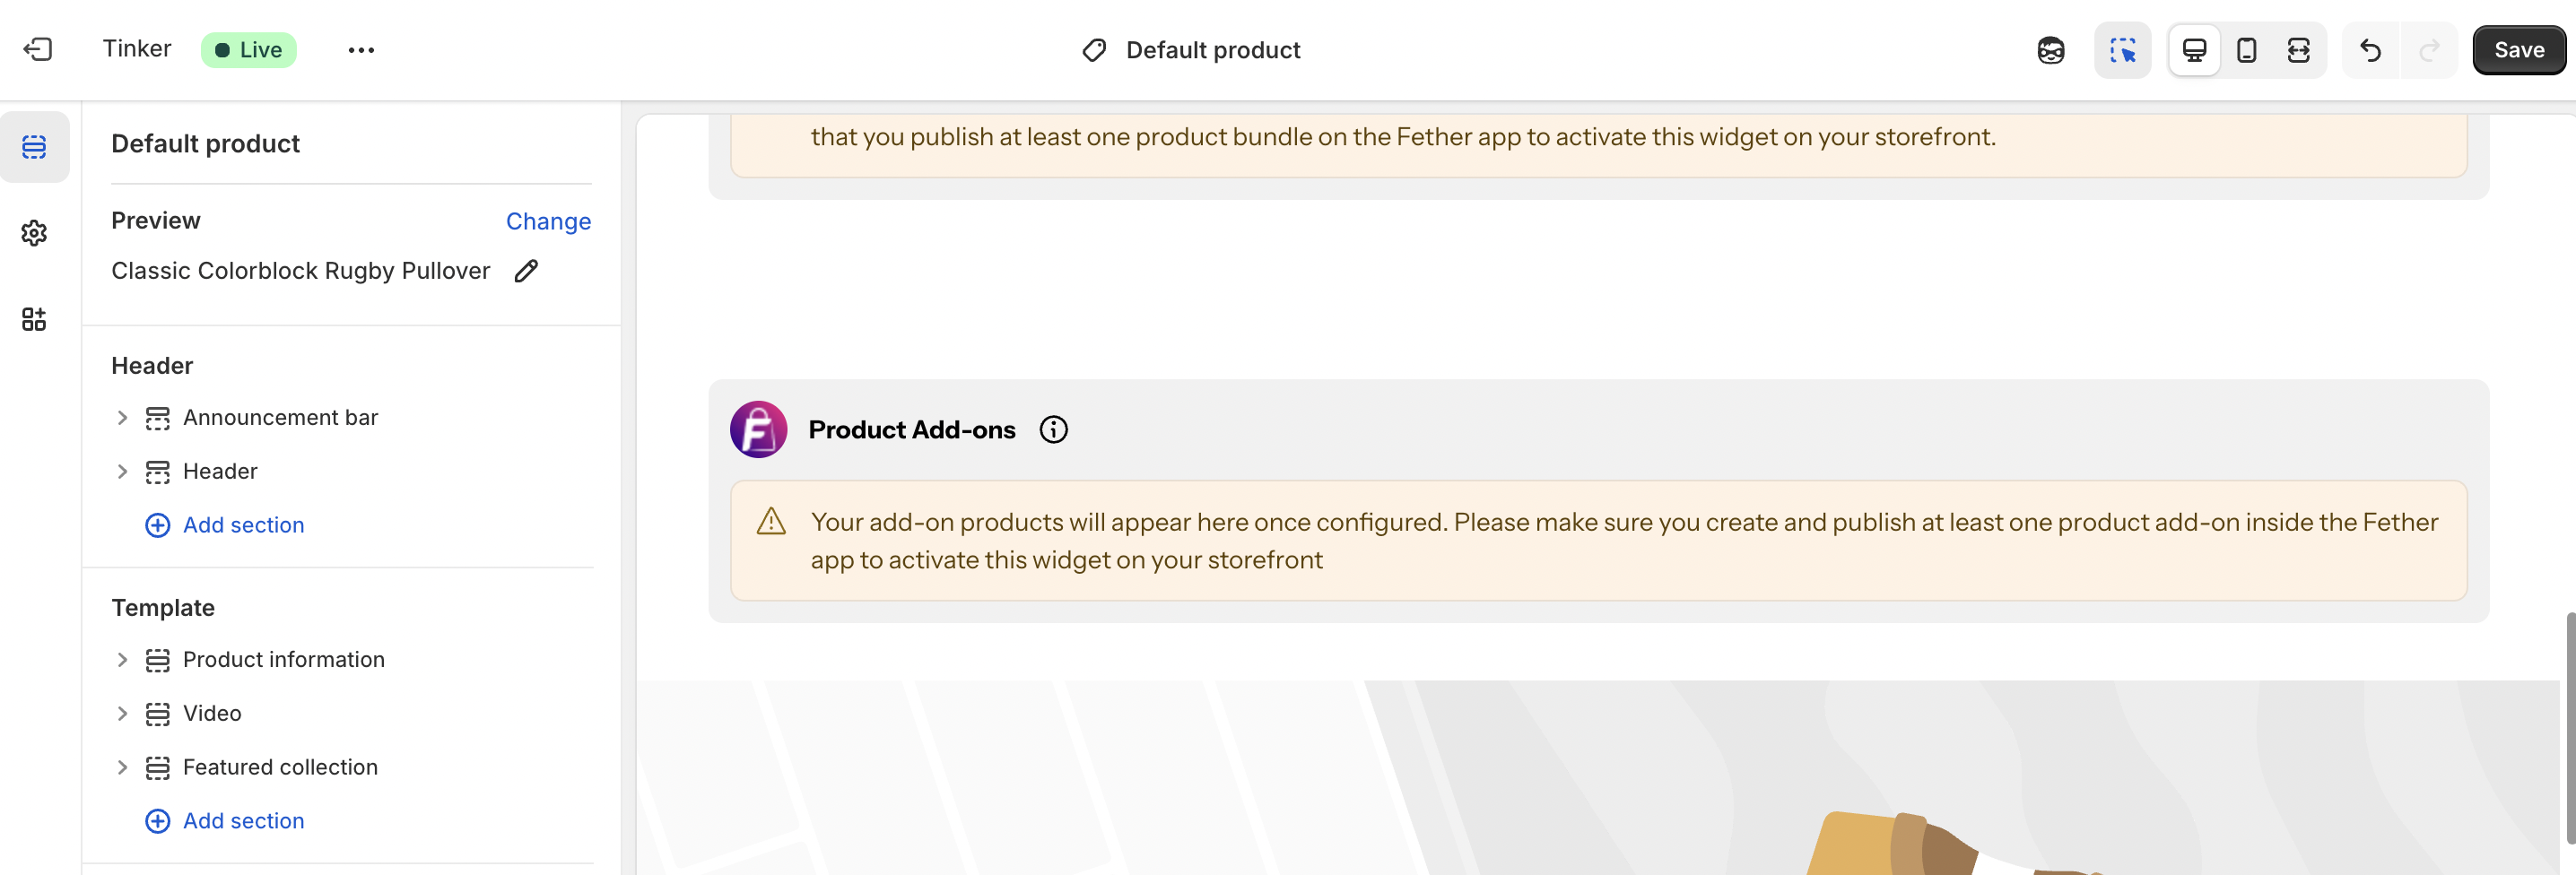
Step 4: Select Product Add-ons to add to your page.
Step 5: Save Your Changes
Once you’re happy with the placement:
Click Save in the top-right corner of the Theme Editor
Visit a product page on your storefront to confirm the widget displays correctly
If you require further assistance, please don't hesitate to contact us at support@fether.app.
Was this article helpful?
That’s Great!
Thank you for your feedback
Sorry! We couldn't be helpful
Thank you for your feedback
Feedback sent
We appreciate your effort and will try to fix the article